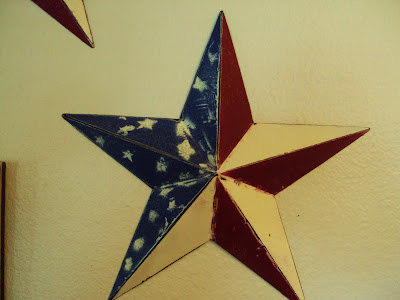
So as I have said before, I get bored easily with my decor and have to snaz it up a bit. Now in all honesty these did not turn out exactly like I wanted.....why? Umm...cause I'm too impaitent to have waited and done it with all the right tools...I jerry rigged it all..lol Ya that's pretty much normal...uh have ya met me? Dur. So I pulled these straight off the wall, and I sanded one for good measure and the other I didn't (to see if it made a diff..it didn't) ...don't bother, who needs an extra useless step? Not me!


I wanted the finished look to be crackled and older looking. Don't bother spending money on crackle paint...there are a few things you can use th at you may already have !
 at you may already have !
I used Modpodge, but you can use wood glue or elmers school glue. Put on a thin coat useing a brush and make the strokes as coo coo as you can to give it more crackles. Just ensure it's 100% dry! Then I sprayed it with Ivory (krylon spray paint)..dry dry dry...GRR I hate waiting! Once dry I used masking tape to section of a little LESS than half of the star and sprayed it Oxford Blue (krylon again)...waiting..

Time for the Cherry Red .Careful of over spray!


Finally time for the starts. I used craft paint to cut out tiny lame-o stars with my exacto knife. Give a light spray of the ivory.

Now see all that crud hanging off them? It's spray paint since it's latex and  stayed on the garbage sack. I used a fine grit sanding block to sand down the edges, then I used a piece of sand paper to sand down the ridges of the star to antique it and lightly sand the colored portions too, it brings out the crackle finish and camoflauges the imperfections of my color lines and stars. That and I like older looking things.
 stayed on the garbage sack. I used a fine grit sanding block to sand down the edges, then I used a piece of sand paper to sand down the ridges of the star to antique it and lightly sand the colored portions too, it brings out the crackle finish and camoflauges the imperfections of my color lines and stars. That and I like older looking things.

No comments:
Post a Comment